Locating the OBD2 port and fitting your tracker
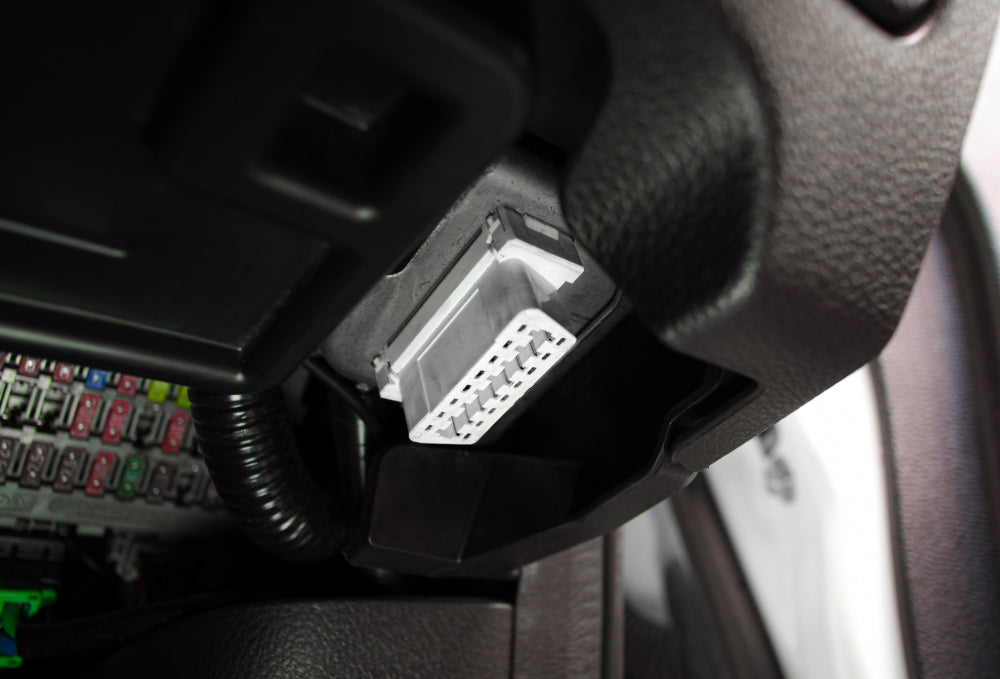
- Your car's OBD2 port is usually located on the side of the driver's footwell or underneath the steering column
- Look above the pedals or under a removable fuse panel. If not visible, check the area around the centre console or beneath the lower dash trim.
- Once located, gently push the tracker into the port and ensure it isn't loose.
- The green status light should begin to flash if successfully connected to power.

Additional Safety Information
- Note: Do not install this OBD2 tracker if its position interferes with the normal operation of the vehicle (e.g. obstructing pedal use, movement or driver's access to the vehicle). We recommend purchasing our OBD2 extension cable for a safer, more flexible fit.
- Please check with your vehicle manufacturer or dealer for the exact location of the OBD2 port. If you're unsure about the correct installation, seek assistance from a qualified professional.
- Installation and/or handling during a lightning storm is prohibited.
- The allowed voltage range is 8-33V DC.
- Before unmounting the device from the vehicle, ignition MUST be OFF.
- This tracker is fitted with a backup battery. Do not install on top of dashboard or in an area subject to high temperatures/direct sunlight. Do not expose tracker to moisture.
- Operating Temperature: -30°C to +60°C.
- Recommended Storage: 10°C to 30°C, Humidity 30%.
- If you experience any vehicle incompatibility issues when the tracker is connected (warning lights or changes to your vehicle's normal behaviour), switch your vehicle off and unplug the unit immediately. Please contact us with your vehicle's make and model so we can relay this information to our manufacturer for review and provide an alternative GPS tracking solution.

• After connecting to power, a green light will begin flashing, indicating the tracker is operating correctly.
• It is normal for the tracker to appear as 'Not connected'for the first five minutes while it downloads the latest settings and completes its initial setup.
• If the tracker does not establish a successful connection before entering Sleep Mode, it will report its location within the first five minutes of its first trip.
